Doing the same old Coffee Brewing process will definitely make you a bore.
Thus, get one Stovetop Percolator and try out different recipes on it, and bring in some change!
You might have heard people saying that ‘Stovetop Percolator makes the coffee taste bad’ But that’s what people say, you gotta test it out by yourself and make a personal judgment about it. Don’t you agree on that?
I know there are a zillion ways of making coffee, you could easily choose out any of them.
So why percolator, right?
Well, I chose it just like that. And another reason for choosing it is for the many myths and stories that I have heard about this machine. Even my friends gave me the suggestion of dropping the idea of percolator and going for a proper Coffee Maker.
Is it that bad as the people say?
Let’s Find Out!
Making a Stovetop Percolator Coffee
Contents
You may compare the Percolator with a Pour Over Coffee, but this one is way far different from it.
On a general note, Coffee Percolators does not have a good image among the coffee baristas and other professionals. They say that the machine does not get you the right temperature, and also the coffee tastes overly bitter in this.
There is nothing wrong in saying that the automatic drip coffee makers came into existence only because of a percolator. But unlike the former one, percolators heat the coffee at a higher temperature which usually results in higher coffee extraction. This makes the coffee taste bitter.
It is important that you know how to set the temperatures rightly while working on a percolator.
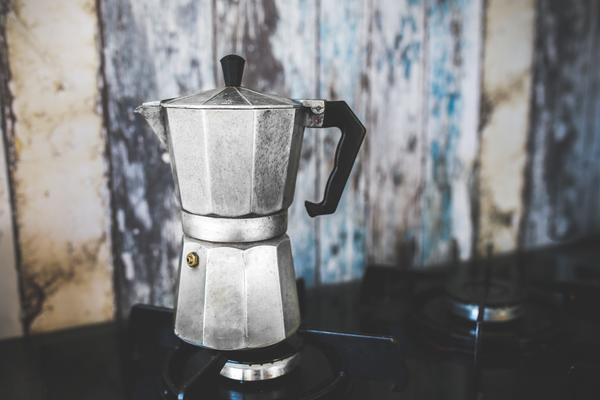
What is a Stovetop Percolator?
The meaning of percolate is to make a solvent, and that’s the main thing a Coffee Percolator does.
It is a steam-powered machine which looks a lot like a tall kettle, but the working is what sets it apart from other Coffee Maker options.
For example, on a pour over coffee maker, the coffee extract is filtered out from the coffee grounds. But on a Coffee Percolator, vacuum brewing plays an important role in the processing. It helps in creating a condition inside the percolator which saturates the coffee grounds before the filtering task.
How to Make a Stovetop Percolator Coffee?
The reason why people are not using a stovetop percolator is the bitter taste it brings in to your coffee. Why does that happen every single time you make a coffee?
I got the reason though.
First of all, if you are a true coffee lover then you must definitely appreciate and respect all coffee blends no matter you like it or not. Is there anything wrong with testing out a new coffee blend?
The main reason for the bitter taste in the coffee is of the high temperature used in the heating of the coffee beans. A high temperature is required for bringing up the pressure for the steeping process. This ends up in making the coffee bitter, and this may even add some metallic flavor to your coffee too.
Therefore, it is important that you understand various brewing temperatures and set them properly for the Coffee Brewing.
While you get started with the Making of a Percolator Coffee, managing the water level is the first thing you need to learn. After that, everything will be damn easy for you! Shall we start? Let’s begin!
Materials required for the processing apart from the Stovetop Percolator- your favorite coffee beans, one coffee grinder, one measuring spoon, water, and your Coffee Mug.
Step 1: Get the coffee measured rightly
This is the first step that you need to perform, measuring the coffee rightly. It is important that you measure the coffee powder, and use the exact amount needed for the brewing. Always make use of fresh ground coffee, instead of using the stored coffee ground.
This will enhance as well as get the perfect flavors out of the coffee beans. For every 500 grams of water, you can use 30 grams of whole ground coffee beans. That’s the standard ratio.
Once you get the hold of the functioning, then you can keep changing the water to coffee ratio and test out the flavors by yourself. Also if you are not used to the bitter taste of the coffee, then you can reduce the amount of the coffee and increase the water measurement.
Step 2: Time to grind the beans
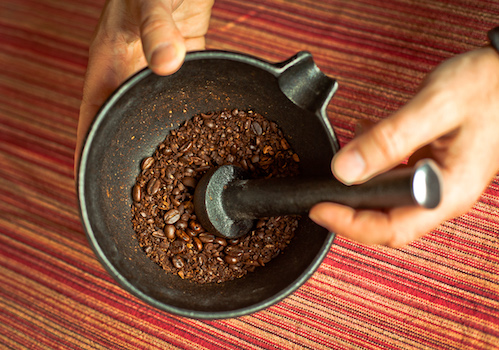
Fine ground is less recommended for a stovetop percolator, therefore the Burr Coffee Grinders work the best in this case. Just get the medium size ground for the percolation process. If the grind is too fine, then they will probably get dissolved in the coffee back with the filtering.
So, this makes the second step where you have to grind your coffee beans. Make it a medium grind, not too coarse and not too fine.
Step 3: Start filling the percolator
Fill up the percolator with cold water, and this amount depends on the quantity of the coffee grounds you are using. We have to heat the water slowly, therefore cold water will be a good option here.
Step 4: Some assembling work that needs to be done
Many of the users skip on reading the manual instructions, and just go with the flow and set the machine by themselves. This is the wrong way of doing it. Now in case you got no manual then Internet can definitely come to use!
Make sure that the stem remains tight inside the water-filled percolator. There is a coffee basket on the top portion, just tighten it up after all the assembling work is done.
Step 5: Add the Coffee Grounds, and then turn the heat on!
It’s time to fill up the coffee grounds in the basket. Pour in the grounds keeping the amount in check.
Another point to note here, coffee percolators have this unique property of making the coffee strong naturally. Therefore, if you add a lesser amount of coffee grounds, then that won’t actually affect the overall taste of the coffee.
Carefully place the percolator on the stove, and then set the flame to low or medium. The heating process should be slow, and also you don’t have to boil the liquid.
Step 6: Keep an eye on your percolator, and set a timer if needed.
That’s the only thing you got to do. You need to keep a watch on the percolator and ensure that the liquid is not boiling inside.

After some time, you will find the water bubbling which is a sign that the water is hot now and is in a state of ‘almost ready to boil‘. Check out the consistency of the boiling, if it is consistent in nature then that means that the water is boiling and you need to turn the flame down.
If there are no bubbles seen, then turn up the heat and let it reach the correct level.
After the boiling begins, you can set a timer for yourself which could be of 6 to 10 minutes depending on the brewing level you wish to have in your drink. Always remember, the more you percolate the more bitter your coffee becomes.
Percolation is a not a set-and-forget process, and once you set it you need to keep a continuous check on the processing.
Step 7: Turn the flame off
Once the boiling is done, and you have run the process for a standard time then its time to turn the flame off. Be careful with the handling, and make use of a towel or a padded glove while taking down the vessel. It is going to super hot, so work it out accordingly, especially when you are taking it off from a countertop.
Step 8: Remove the Coffee Ground
You can’t directly pour in the coffee and enjoy it. It has got coffee grounds in it, and you need to remove them in the first place for a filtered drink.
So the next step would be to remove the grounds from your coffee. Who wants it that anyway?
For this, you can even make use of the usual mesh strainer found at all homes. Pour in the coffee into your mug as you filter the coffee grounds on the mesh strainer.
Step 9: You are done with the processing! Enjoy.
That’s it! Coffee is ready in your cup, you just have to sip and enjoy it.
Though it’s a hard way or an old method of preparing the coffee, it still remains a classic. This process never fades away and definitely, it requires the practice to make it better each and every time. Be careful with the boiling, and just brew it away!
EndNote
I have some old memories of my grandma using the Coffee Percolator and using it for serving us all with the delicious cup of coffee. It will be slightly bitter in taste though, but that’s what makes the percolation different from others.
Always remember- Practise makes a man perfect, and don’t lose hope on your first attempt. Keep the brewing continued, and make sure that you don’t over-boil it.
Do a quick follow on CoffeeMakered for regular coffee updates and interesting Coffee feeds.
Cheers!